
You can view more of my films on Vimeo
Film grain is a fantastic way to help add an organic look to your digitally shot footage. I use it often, almost every project I work on actually. It's especially helpful when you are using denoising plugins and the absence of grain becomes a little unnatural. I am going to show you how you can add film grain in Premiere Pro CC, but the same principles apply to all editing programs.
Here is an Adventure Film that I added Film Grain Too
A Free Pack of Film Grain
Here is where you can get a free film grain pack: Gorilla Grain. The sign up form to receive the download is on the right hand side.
Step One: Finish Your Edit
Add your film grain after you have completed your edit and color correction. Adding it to your Timeline can slow down playback so I prefer to add it last. One thing to note is when you are color correcting you can be a little on the dark side because *when you add the grain it brings up the brightness of your shots. *
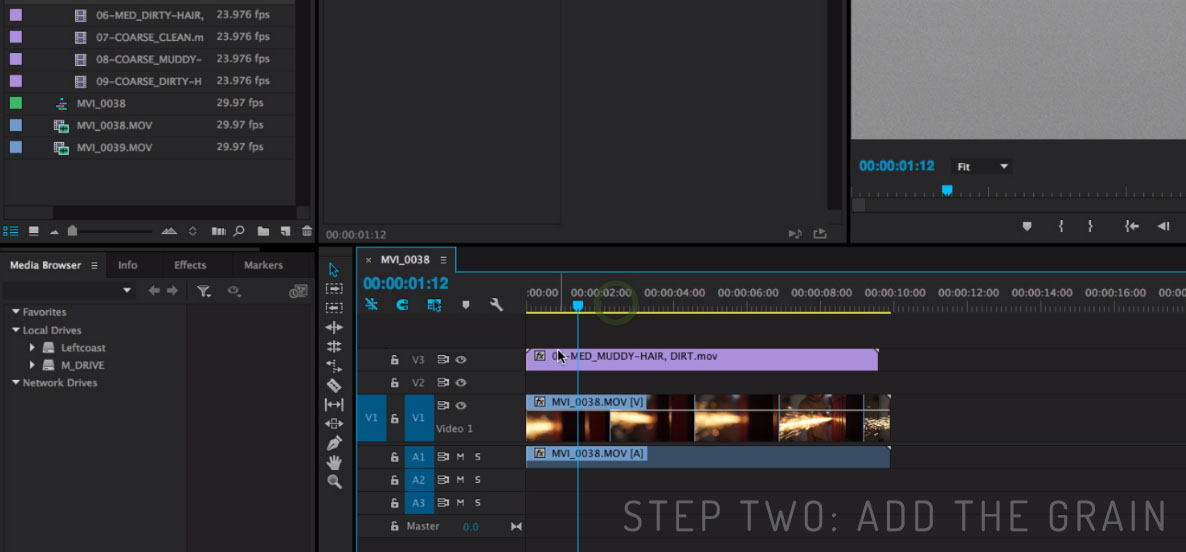
Step Two: Import Your Grain and Add to Sequence
After importing your grain pack of choice you have a few options to pick from. Most packs will come with a Fine, Medium, and Course grain. They also come in varieties of how much dirt or grit the have in them. My favorite is Medium Clean, once you have selected your add it to your sequence in the layer above your footage.
Step Three: Change Blend Mode to Overlay

Go to the effects controls panel and drop down the opacity settings. Then change the blend mode to overlay. Windows>Effects Controls>Opacity>Blendmode>Overlay You can fine tune how much grain you want by using the percentage. I tend to use somewhere between 60-85% most of the time, but it is really your call.

Step Four: Multiply the clip across the sequence
When your grain is fine tuned, you can copy and paste it across the rest of your sequence. If you make any changes to your settings you can select opacity from the effects controls window, copy it, and then paste it to all of your clips to change them as well.
Bonus Tip: Helping Your Dissolves Work

You will notice now that if you try add a dissolve or fade to black on one of your clips it does really work. One way to fix this is by adding a black color matte underneath your shot that has the fade to black. You can make a color matte by going to File>New>ColorMatte
Well there you have it, a really straight forward process. I encourage you to give it a shot and see how you like the results. I love the way it looks on my adventure films and other pieces that I want organic texture in. If you have any questions please do not hesitate to ask. I love that you stopped by to watch this tutorial. It would be great to see your results, connect with me on twitter or Facebook and show me what you've made.
Until next time, Remember life’s better when you make stuff
 RECEIVE FREE GUIDE & NEW TUTORIALS
Subscribe to get my free guide, and receive all the latest adventure content straight to your inbox.
